11ty, GitHub and Neocities
Building a site using 11ty and deploying it to Neocities.
Posted on: 2023-12-03
Woah, first blog on this website! Hey y'all, this blog post will be talking about using Eleventy (or 11ty) and using GitHub to deploy your site onto Neocities! People like me, you and others might've used the built-in Neocities code editor to edit your sites before, and later noticed on how tedious it was to copy and paste the same code on different pages. You've probably tried to find a more faster and efficient way of doing this, well there is! This guide might take at least 30 minutes or less, depending on you, but once you finish this guide, you will be happy that you made the change.
Do note that this guide assumes that you are familiar with HTML and CSS. If you don't, I suggest you start learning about it; don't worry, it's easy! See here for resources.
Now, before we start using Eleventy, we'll need to install some stuff first.
Installing programs
- Any code editor of your choice. However, I recommend Visual Studio Code. We will be using GitHub later to sync files between computers and to deploy it to Neocities everytime we push commits. VSCode has a built in feature to connect to GitHub repositories without the use of...
- GitHub Desktop. If your code editor of your choice cannot connect to GitHub, install this program instead. You can still use this program with VSCode if you want to.
- Node.js. This is needed to install and run Eleventy. (11ty v2.0.1 requires version 14 or higher).
- (Optional) Better Nunjucks Syntax. A VSCode extension for highlighting Nunjucks syntax. Also supports .html and .md file extensions. We'll go in depth later on what Nunjucks is, and it's alternatives that Eleventy supports.
Getting started
Before we start, you can also read the official Eleventy documentation here. This guide here will explain what's mentioned in the official guide, but in the most simplified way that I can put it in.
Creating a directory for your site
We will be doing most of this process via CLI (Command Line Interface).
If you already have a site on Neocities and you are willing to convert it to use Eleventy, read below. If not, you can skip this part.
You can also create a repository on GitHub, clone it to your device, and start the project from there.
To download your site from Neocities, navigate to your Dashboard. On the bottom where you see all of your files, you should see a link that says "Download entire site"; click on it and unzip the files to a directory of your choice. Also keep another copy of your downloaded site to act as a backup.
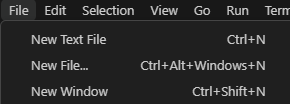
If you choose to start a fresh new project, you can create a new folder in any directory that you choose. (For me I usually put it in Documents). We'll name the folder 11ty-project, but you can choose any name you want. Now open VSCode, navigate to File -> Open Folder, select 11ty-project and click on Select Folder. From now on, 11ty-project is where you'll be creating your website. The next step now is to install Eleventy.
Installing Eleventy
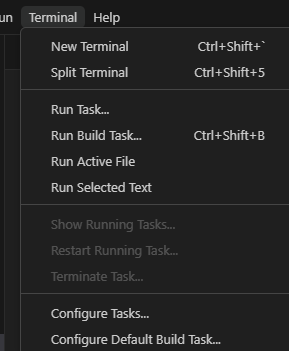
In VSCode, navigate to the header and click on Terminal -> New Terminal.
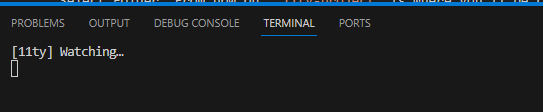
Alternatively, you can click and drag up the footer to bring up the terminal.
Of course, you can also open up an external terminal and navigate to 11ty-project with cd; but we'll focus on the built-in terminal in VSCode.
Make sure that terminal directory is set to the current folder you are currently on in VSCode. If so, run this command:
npm init -y
If it succeeds, then we can install Eleventy now:
npm install @11ty/eleventy
To check if Eleventy is installed correctly, enter this into the terminal:
npx @11ty/eleventy
If it returns says that Eleventy wrote 0 files, congrats! Reason it says that it wrote 0 files is because there are no files to convert. Now it's time to configure some stuff before we start converting files/building a website.
Configuring Eleventy
As you may have noticed that there is now three new files that were added when we ran npm init -y and npm install @11ty/eleventy, that being package.json, package-lock.json, and node_modules. We will only focus on package.json; open it up in VSCode. The file might look something like this:
{
  "name": "11ty-project",
  "version": "1.0.0",
  "description": "",
  "main": "index.js",
  "scripts": {
    "test": "echo \"Error: no test specified\" && exit 1"
  },
  "keywords": [],
  "author": "",
  "license": "ISC",
  "dependencies": {
    "@11ty/eleventy": "^2.0.1"
  }
}
Let's add some stuff here. Add the following code in the "scripts" section; remove the "test" as well:
"start": "npx @11ty/eleventy --serve",
"build": "npx @11ty/eleventy"
Here's what package.json should look like now:
{
  "name": "11ty-project",
  "version": "1.0.0",
  "description": "",
  "main": "index.js",
  "scripts": {
    "start": "npx @11ty/eleventy --serve",
    "build": "npx @11ty/eleventy"
  },
  "keywords": [],
  "author": "",
  "license": "ISC",
  "dependencies": {
    "@11ty/eleventy": "^2.0.1"
  }
}
Press Ctrl + S to save the file.
Now whenever we want to start our localhost server, or build it, instead of typing npx @11ty/eleventy --serve, we instead type in npm start. For me, it feels much faster and easier to type it out.
Next step now is to create a .eleventy.js config file. Make sure you create the file in the main folder. Copy and paste the following code into your .eleventy.js file:
module.exports = function (eleventyConfig) {
  return {
    passthroughFileCopy: true,
    dir: {
      input: "src",
      output: "public",
      includes: "_includes",
    },
  };
};
Now let's walk through what all of that code means.
inputis where Eleventy looks for files to be converted.outputis where the finished product of your website will be in._includesis where all of your template files will be in.
It's like a bakery; input is where the unbaked code is, that are eventually baked by Eleventy (converted to HTML), and finally put on display in the output file. If input is set to src, then Eleventy will look through the src file and outputs the final product in public. The output might also be set to _site. You can configure it to suit your likings.
Creating a .gitignore file
If you plan not to use GitHub, you can skip this part.
Since we'll be publishing these files to GitHub, we'll need to exclude some files first. Create a .gitignore file in the root file; then add the following code:
# dependencies installed by npm

node_modules

# build artefacts

public
Once you save the file, you might notice that node_modules and public (if created) gray out. That means that those two files will never be commited to your site's repository. Never commit node_modules and public to your site's repository.
Finally, Eleventy has been set up! Next up; we'll learn how to use template files with Nunjucks.
Templating
Templating is what makes creating pages more simple. Instead of having to copy and paste the <head> code onto every page (and doing the same thing whenever you make a change to the <head> code and want it to be on every page), we use a template file to do all of that for us! To get started, create a new folder directory named _includes in your src folder. (If you have no src folder, create that first). Then create a new folder inside _includes and name it layout. Inside the layout folder, create a file named base.njk.
We'll be using Nunjucks for templating. You can also use Liquid if you want; maybe even both. But we'll stick to Nunjucks.
Inside base.njk, copy and paste the sample code below:
<!DOCTYPE html>
<html lang="en">
  <head>
    <meta charset="UTF-8">
    <meta name="viewport" content="width=device-width, initial-scale=1.0">
    <title>{{ title }}</title>
  </head>
  <body>
    <h1>{{ title }}</h1>
    <main>{{ content | safe }}</main>
  </body>
</html>
You may have noticed that the code is similar to HTML, only difference is that we got new stuff like {{ title }}. Don't worry, this is easy to understand.
Using template files
Before we start, Eleventy has support for different files that can be converted to HTML; we'll use Markdown for this guide. If you want, you can also write your pages with HTML, Nunjucks, Liquid, etc. By default, Eleventy reads HTML and Markdown files as Liquid template files. You can configure Eleventy to read HTML and Markdown files with a different template language of your choice. Read more here.
Inside your src folder, create a file named index.md; index.md is the main page of your site, when people type in the URL of your site, they'll be directed to there.
Before we start writing stuff, we're gonna write some front matter first:
‐‐‐
title: Main Page
layout: layout/base.njk
‐‐‐
Remember the {{ title }}? The page title will now be named "Main Page". The front mattter here is used to define different variables and the layout that the page will be using. Now we can finally write the content of the page:
‐‐‐
title: Main Page
layout: layout/base.njk
‐‐‐

# Welcome to my website!

So many ideas run through my head! Woah!!!

<strong>Did you know you can mix HTML with Markdown?</strong>

**Neat, ain't it?**

Lists?
- Yeah
- That's
- Right
- Unordered tho.
  1. No worries!
  2. Let your creativity grow strong!

## Is that cool?
Code that's outside of the front matter will be converted to HTML and written inside the {{ content | safe }}. No longer the messy <head> code will get in your way now, and you can change the <head> code in all of your pages in less than 5 seconds! Of course, the front matter doesn't need to be included all the time. If you're planning for a page to have it's unique own style than the rest, then you can include all of the <head> code and stuff.
Here's another cool thing: template files can inherit other template files!
Partials
Partials are like little bits of code than can be included by any file in your site. Stuff like the navigation and footer bar could be partials.
Now why partials?
It's similar to templating, but instead of aquiring it via front matter, you use {% include "partial_name" %}. Let's get started by adding a navigation and footer bar to our website.
Inside your _includes folder, create a folder and name it partials. Inside your partials folder, create these two files:
navbar.njkfooter.njk
Open up navbar.njk and copy and paste the following code inside it:
<a href="/">Home</a>
<a href="/page1">Page 1</a>
<a href="/page2">Page 2</a>
Those two links below the Home link are just for demonstration. You can create different pages and add the relative links to those pages to the navigation bar instead.
Open up footer.njk and copy and paste the following code inside it:
<p>This is the footer bar.</p>
Now it's time to include these two snippets of code. Open up base.njk and add these two lines of code:
<nav>{% include "navbar.njk" %}</nav>
Copy and paste the <nav> code below the <h1> and not inside the <main>.
<footer>{% include "footer.njk" %}</footer>
Copy and paste the <footer> code below the <main>.
Your base.njk should now look like this:
<!DOCTYPE html>
<html lang="en">
  <head>
    <meta charset="UTF-8">
    <meta name="viewport" content="width=device-width, initial-scale=1.0">
    <title>{{ title }}</title>
  </head>
  <body>
    <h1>{{ title }}</h1>
    <nav>{% include "navbar.njk" %}</nav>
    <main>{{ content | safe }}</main>
    <footer>{% include "footer.njk" %}</footer>
  </body>
</html>
Now whenever you make a change to navbar.njk or footer.njk, any pages that are using the base.njk template will also include that change.
Including CSS, images, and other assets
If you tried to include CSS, images, or other assets to your website, you've noticed that it doesn't apply the stylesheet. Remember the .eleventy.js file earlier? We're gonna add a bit more code inside that file. Don't worry, it's easy. But first, create a folder inside src and name it css. You also add images, js, and other folders to organize your files. Now that we have our files, let's tell Eleventy to include those files to our build:
module.exports = function (eleventyConfig) {

  eleventyConfig.addPassthroughCopy("css");
  eleventyConfig.addPassthroughCopy("images");
  eleventyConfig.addPassthroughCopy("js");

  return {
    passthroughFileCopy: true,
    dir: {
      input: "src",
      output: "public",
      includes: "_includes",
    },
  };
};
addPassthroughCopy is what tells Eleventy to include the files inside that folder to our build. You can also tell Eleventy to include specific files/folders as well:
eleventyConfig.addPassthroughCopy("style.css");
eleventyConfig.addPassthroughCopy("images/thumbnails/art1.webp");
eleventyConfig.addPassthroughCopy("Roboto_Mono.ttf");
eleventyConfig.addPassthroughCopy("assets/fonts");
Only files that are images, stylesheets, fonts, videos, JavaScript, basically anything that does not need to be converted to HTML, needs to be included with addPassthroughCopy. Save the file and Eleventy will include those files.
Whew! That's alot. But congrats! You made a site using Eleventy! Now, let's see the final product, without publishing it to the public.
Previewing your site
Eleventy has a feature to start up a localhost of your website. If you're already running a localhost of your website, you can skip this part. Congrats tho for figuring it out.
In your terminal in VSCode, type in npm start. Eleventy will then start a localhost of your website. Your website will be available at http://localhost:8080. The 8080 part is the port; the port number might be different, but it's most likely to say 8080.
Using GitHub to deploy your site to Neocities
Set up via GitHub Desktop
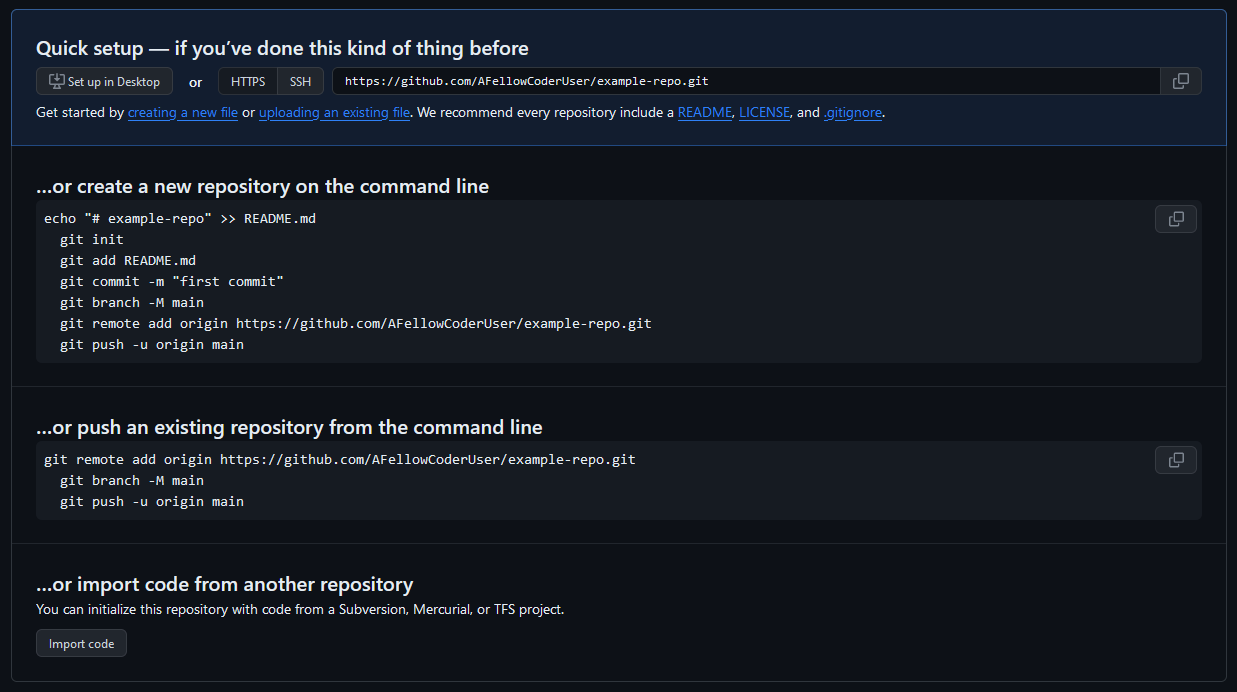
We'll be using GitHub to both sync files between computers and publishing the site to Neocities. If you have a GitHub account, create a new repository. Name the repository to anything you want, I'll name it 11ty-neo. It's optional if you want to add a README file; you can create it later. Same goes for the LICENSE. No need to worry about creating a .gitignore file, because we already have it. Click on "Create repository"; you'll be prompted with this:
You can click on "Set up in Desktop" and it'll open GitHub Desktop if you have it installed. This will create a folder inside a folder named "GitHub" inside your Documents (if it doesn't exist yet), as well as another folder with the same name as the repository that you created inside the GitHub folder. Now you can move/copy the files from 11ty-project to 11ty-neo. (Except node_modules and public)!!
Set up via VSCode
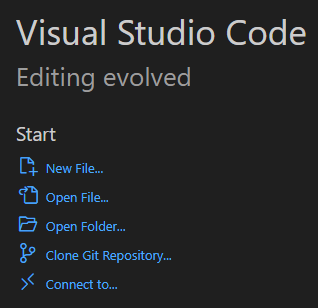
Alternatively, if you can't use GitHub Desktop, you can clone the repository with VSCode. To do so, open VSCode in a new window (File -> New Window) and click on Clone Git Repository.
You might be prompt to sign in to GitHub and ask you to allow the process, accept it and it'll ask you where to clone the repository. I prefer cloning the repo inside the GitHub folder. Confirm the selected destination and the files will be cloned. Make sure that you allow the folder to access all features. Then you can move/copy the files from 11ty-project to 11ty-neo.
Once your done copying the files, you can commit and push the changes to your repository.
Congrats! Now you can work on your site on multiple devices! Just make sure to sync changes everytime you open VSCode/GitHub Desktop. Sorry if some things don't make sense, but if you did understand it, congrats again!
Deploying your site to Neocities
We will add an action that makes GitHub deploy our new site to Neocities everytime we commit and push changes. In your main folder, create a folder named .github and create another folder inside named workflows. We'll be using bcommes' Deploy to Neocities action.
Inside the workflows folder, create a file named neocities.yml. Inside neocities.yml, copy and paste the following code:
name: Deploy to neocities

# only run on changes to master
on:
  push:
    branches:
      - main

concurrency: # prevent concurrent deploys doing strange things
  group: deploy-to-neocities
  cancel-in-progress: true

jobs:
  deploy:
    runs-on: ubuntu-latest

    steps:
    - uses: actions/checkout@v3
    # Set up any tools and build steps here
    # This example uses a Node.js toolchain to build a site
    - name: Use Node.js
      uses: actions/setup-node@v3
      with:
        node-version: lts/*
    - name: Install deps and build
      run: |
        npm i
        npm run build
    # When the dist_dir is ready, deploy it to neocities
    - name: Deploy to neocities
      uses: bcomnes/deploy-to-neocities@v1
      with:
        api_token: ${{ secrets.NEOCITIES_API_TOKEN }}
        cleanup: true
        dist_dir: public
Don't worry about most the code, but here's what we need to keep note of:
branchesshould be set to the main branch of your repository. Your repo's main branch is already named "main", so you're all good.dist_dirshould be set to the name of the output folder that we defined earlier. In this guide, the output folder's name is set topublic.cleanupis what handles the deletion of files. This will check for files in Neocities that are not present in thepublicfolder and deletes them. I recommend setting it to true, as you don't want any conflicting files once you publish the site.
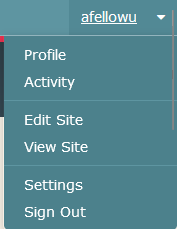
Now for ${{ secrets.NEOCITIES_API_TOKEN }}, we'll need to go to Neocities first and then GitHub. First go to Neocities and go to Settings (Click on your name -> Settings):
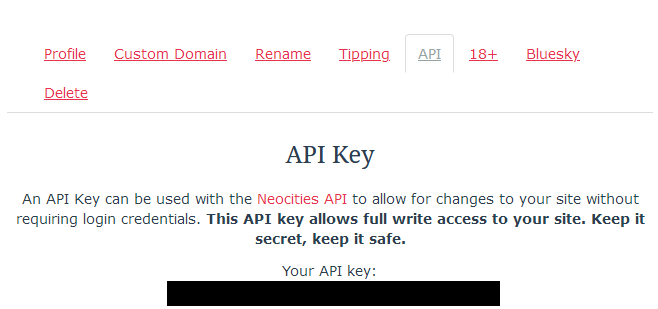
Click on Manage Site Settings, which is beside your account name. Then click on API. You will see an option to generate an API key if you haven't yet. Generate the key and copy it.
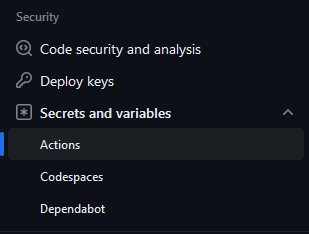
Next step is to go to GitHub. Go to the repository that you're working on now and click on Settings on the top.

Navigate to the side and click on Secrets and Variables and go to Actions.
In Actions, click on Secrets. Scroll down and you'll see a green button that says New repository secret. Click on that button.
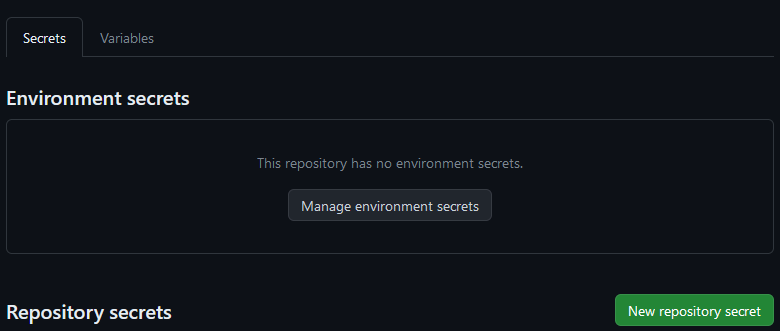
Name your repository secret "NEOCITIES_API_TOKEN", paste your site's API key into the value field and save it.
Nice, everything is ready. Make sure you have a copy of your unconverted site first. Save your files, commit and push those changes to your repository. Once the pushing is complete, this will trigger an action caused by the neocities.yml file that will build your site and then deploys it to your Neocities site. Once the action succeeds, your new site can be seen!
Conclusion
Congrats on finishing this post! And congrats again if you've managed to understand everything that's written here. Really hope that this post helps you in any way and lessens the pain on maintaining your website! I'll tell you this, I've only known Eleventy for only a couple of weeks at the time of writing this blog, so I'm not an expert. If you got any further questions, you can contact me on Neocities or any of my socials that I linked here and I'll try to help in any way I can.
Well, that concludes this blog post, hope y'all have a good day!!!
References used to make this blog
My Neocities workflow: using Eleventy and the CLI to speed up development